
X11 app in Kotlin/Native
In this blog post, we will go step by step through a process of creation of a simple full-screen always on top Linux application. It will dim the screen and only highlight area around mouse cursor like in a stage light. I won’t be using any UI framework, but stick to bare essentials provided by Xlib. There are two reasons to do this: first, all frameworks have a huge toolkit of UI elements, such as buttons or menus, but they are not very well suited to just show a semi-transparent window and paint on it. Second, it makes a lot of fun to dig into a low-level technology and learn how it works.
X Server is an application that manages graphics displays and input devices (keyboards, mice, etc.) on Linux. It is also known as X11 because it implements the eleventh version of the X protocol. The most widely used implementation now is X.org. X server uses a client-server model. GUI applications usually run on the same computer, but it may also work over the network. It is possible to write a GUI application using only Xlib—a X11 client library, but usually, high-level UI frameworks are used, like GTK+ or Qt.
I will be using Kotlin/Native, so you’ll also learn how interoperability with native C libraries works in Kotlin/Native.
Here is what I will be implementing tonight.
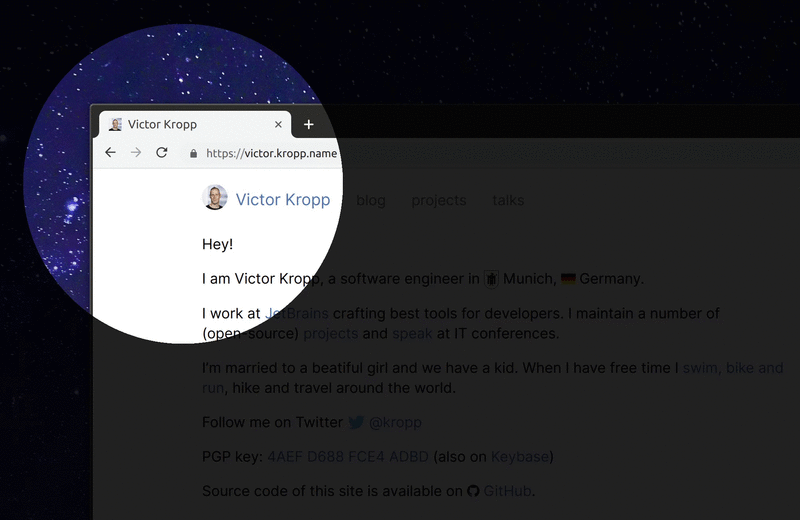
My homepage in spotlight
Interoperability with C libraries
So, let’s start! To begin with we need to teach Kotlin/Native how to use Xlib. Kotlin/Native compiler includes a tool called cinterop. It generates bindings to native libraries defined in .def file. Here’s the definition for Xlib:
package = x11
headers = X11/Xlib.h X11/Xutil.h X11/Xatom.h
headerFilter = X11/*
compilerOpts = -I/usr/include/ -I/usr/include/x86_64-linux-gnu
linkerOpts = -lX11 -L/usr/lib/x86_64-linux-gnu/
Here, we give the generated package a name, x11 in our case. We tell cinterop to generate bindings to all functions and structs defined in Xlib.h, Xutil.h and Xatom.h (we’ll see later why we need these header files) and transitively included from them, but filtered by path mask X11/*. This prevents us from accidentally generating bindings for the whole world.
compilerOpts set the base path to search for header files and linkerOpts tell compiler to link to libX11.so and where to find it. You can find complete reference for the tool in the official documentation.
Basic app
Initialization
To connect to a X Server we open a display connection.
val display = XOpenDisplay() ?: error("Can't open display")
val screen = XDefaultScreenOfDisplay(display) ?: error("Can't detect default screen")
val screenWidth = screen.pointed.width.toUInt()
val screenHeight = screen.pointed.height.toUInt()
XFree(screen)
Kotlin’s cinterop usually does a good job, so this code looks pretty much like its C analogue, just with a little mix of Kotlin flavor.
To dereference a pointer there is an extension property CPointer.pointed. It works as expected, even though it requires more typing compared to * or -> in C/C++.
Despite width and height are signed integers in Screen subsequent APIs will require unsigned integers, so we also convert them immediately. In C such conversions are implicit, so in many places like this, types are inconsistent. Kotlin is much stricter, which results in more verbose, but hopefully safer code.
Create and show window
Next step is to create a window. We want our window to be semi-transparent, so we need to set some custom window attributes. C structs are mapped to Kotliln classes, but in order to be able to pass them later to native code, we need to allocate them in native memory. We create XVisualInfo struct by calling alloc inside a memScoped block. To prevent memory leaks everything allocated inside this block will be freed on exit.
Created object will have .ptr extension property which works like & operator in C. It returns a pointer to a local variable.
Similarly XSetWindowAttributes struct is created. The important thing here is to set 32-bit depth to allow transparency. Finally, a window is created with all the attributes specified.
val window = memScoped {
   val visualInfo = alloc<XVisualInfo>()
   XMatchVisualInfo(display, screenNumber, 32, TrueColor, visualInfo.ptr)

   val attrs = alloc<XSetWindowAttributes> {
       override_redirect = 1
       colormap = XCreateColormap(display, XDefaultRootWindow(display), visualInfo.visual, AllocNone)
       border_pixel = 0UL
       background_pixel = 0xffffffUL
   }.ptr
   XCreateWindow(display, XRootWindow(display, screenNumber), 0, 0, screen.width, screen.height, 0, visualInfo.depth, CopyFromParent.toUInt(),
       visualInfo.visual, (CWColormap or CWBorderPixel or CWBackPixel or CWOverrideRedirect).toULong(), attrs)
}
We don’t need visualInfo and attrs after window is created and memScoped takes care of them.
The window can be shown as easy as
XMapWindow(display, window)
XRaiseWindow(display, window)
XFlush(display)
This code snippet puts the window on a given display, brings it to front and forces repaint. And again it doesn’t differ at all from its C counterpart.
Auxillary settings
It is unnecessary for this particular application, but we can set the window name, which will be displayed in window switcher and window class name which will be used to match window and application icon. I only include this snippet to demonstrate a small inconsistency in C-interop.
const val APPLICATION_NAME = "spotlight"

XStoreName(display, window, APPLICATION_NAME)

memScoped {
   val hint = alloc<XClassHint> {
       res_name = APPLICATION_NAME.cstr.ptr
       res_class = APPLICATION_NAME.cstr.ptr
   }
   XSetClassHint(display, window, hint.ptr)
}
When calling a C function char* parameter is translated to Kotlin’s String, so the function call is absolutely transparent. However, if we need to pass the very same string in a struct field the things get complicated: we need first to convert it to a C-string (effectively array of bytes) and then get a pointer to it. Thus, this .cstr.ptr calls inside a memScoped.
Always on top
To keep the window always on top, we need to ask a window manager to do it for us by sending it an event.
val e = alloc<XEvent> {
   xclient.apply {
       type = ClientMessage
       message_type = XInternAtom(display, "_NET_WM_STATE", False)
       this.display = display
       this.window = window
       format = 32
       serial = 0UL
       data.l[0] = 1
       data.l[1] = XInternAtom(display, "_NET_WM_STATE_STAYS_ON_TOP", False).toLong()
   }
}
XSendEvent(display, XRootWindow(display, screenNumber), False, SubstructureRedirectMask, e.ptr)
XEvent is a union in C, which combines all event types in a single structure by mapping the same memory area to different fields depending on a way you access it. You cannot define such data type in Kotlin, but accessing native union types works as expected. Each possible variant is represented by a property.
Hiding and showing mouse cursor
To hide mouse pointer we create an empty cursor out of an empty bitmap with empty mask and default color both for foreground and background. Since both the shape and the mask of the cursor are empty it doesn’t really matter what color we use. This method only hides the pointer, all the associated events, like hovering or clicks still work.
To show the cursor back we revert the change by call to XUndefineCursor.
@kotlin.ExperimentalUnsignedTypes
class MousePointer(private val display: CPointer<Display>, private val window: Window) {
   fun hide() = memScoped {
       val bitmap = XCreateBitmapFromData(display, window, "\u0000\u0000\u0000\u0000\u0000\u0000\u0000\u0000", 8, 8)

       val black = alloc<XColor> {
           red = 0U
           green = 0U
           blue = 0U
       }
       val cursor = XCreatePixmapCursor(display, bitmap, bitmap, black.ptr, black.ptr, 0, 0)

       XDefineCursor(display, window, cursor)

       XFreeCursor(display, cursor)
       XFreePixmap(display, bitmap)
   }

   fun show() {
       XUndefineCursor(display, window)
   }
}
In this case, automatic char* to String conversion by cinterop is unnecessary. It is possible to disable it for a specific function by adding noStringConversion = XCreateBitmapFromData to x11.def
We may improve performance of this snippet by allocating cursor in a nativeHeap, which is a global scope, and saving it to a field.
Event loop
We’ve finally come to a core part of the program, the event loop. In an infinite loop, we will listen to input events, like mouse motion and redraw the window accordingly.
XSelectInput(display, window, PointerMotionMask or ButtonPressMask or ButtonReleaseMask or KeyPressMask or KeyReleaseMask)

val gc = memScoped {
   val values = alloc<XGCValues> { graphics_exposures = False }.ptr
   XCreateGC(display, window, 0UL, values)
}

val event = alloc<XEvent>()
while (true) {
  XNextEvent(display, event.ptr)

  XSetForeground(display, gc, 0xdd000000UL)
  XFillRectangle(display, window, gc, 0, 0, screen.width, screen.height)
  if (event.type == MotionNotify) {
    XSetForeground(display, gc, 0x00000000UL)
    XFillArc(display, window, gc, event.xmotion.x - SIZE / 2, event.xmotion.y - SIZE / 2, SIZE.toUInt(), SIZE.toUInt(), 0, 360 * 64)
    XFlush(display)
  }
}
This is pretty simple, we choose the event types we are interested in and process them one by one. The program will block until next event.
To draw a spotlight we fill the window with semi-transparent black. XFillRectangle does the job, the first component of the foreground color dd000000 is alpha-channel. And then draw a fully transparent circle above.
That’s it.
Check out the full source code of this example!
Lessons learned
In this article, we’ve seen how to generate Kotlin/Native bindings for native libraries, how clever string bindings are implemented, but also the shortcomings in current implementation, how to create and pass structs to native functions from Kotlin code, and how unions are mapped to Kotlin.
Overall, Kotlin version of the program is only a little bit verbose compared to the C code, but the resulting code is much safer. And I believe this is a fair price.
Subscribe to all blog posts via RSS